
Backyard Wellness Projects: Turn Green Corners Into Zen Spaces
Want to relax and recover without relying on spas? Create backyard wellness projects that you can use the moment you step out of your door. In this guide, we’ll show you how to build self-care setups yourself. By the end, you’ll know which structure works best for your yard.
Backyard Wellness Projects: Create Zen Zones Right Outside Your Door
Backyard wellness projects offer activities for mental relaxation and physical well-being. These setups incorporate heat and cold elements to help with blood circulation and muscle recovery. Here are three self-care structures you can build in your yard:
Backyard Sauna
A sauna session helps dilate the vessels and improve cardiovascular function. Additionally, taking regular heat therapy can help promote melatonin production and enhance sleep quality. According to Harvard Health, beginners should start with 10–15 minutes per session and aim for two to three visits per week to see lasting benefits.
Materials
- Concrete mix or pavers
- Pressure‑treated 2×6 joists, 2×4 studs, exterior‑grade plywood
- Mineral‑wool batts and foil‑faced vapor barrier
- Tongue‑and‑groove cedar boards, cedar planks for benches
- Exterior screws/nails, vent covers, wood sealant
- Roofing panels or shingles with flashing
- Sauna heater (electric or wood) and required wiring or stovepipe parts
How to build an outdoor sauna
- Pick the right spot. Choose a flat area with good drainage and select a location near an electrical outlet for your power source.
- Decide whether to opt for a kit or a custom build. Beginner-friendly sauna kits come with pre-cut parts and easy-to-follow instructions. If you prefer a DIY approach, download or sketch a basic plan for a 6×6-foot cabin.
- Lay a solid foundation. Pour a small concrete pad or set down concrete pavers. Make sure it sits perfectly flat to prevent wobbling.
- Assemble the floor frame. Screw treated 2×6 joists onto the foundation. Then, place joists 16 inches apart and cover them with exterior‑grade plywood.
- Build and raise wall panels. Cut 2×4 studs to your chosen wall height. Nail studs to a top and bottom plate, then lift each panel into place and secure it to the floor frame.
- Install the roof. Attach pre‑cut rafters or roof trusses. Cover the plywood sheathing with weatherproof roofing material, such as metal panels or asphalt shingles.
- Add insulation and vapor barrier. Fit mineral‑wool batts between studs. Then, staple foil‑faced vapor barrier over the insulation to keep moisture out of the walls.
- Line the interior. Nail tongue‑and‑groove cedar boards to the wall studs and ceiling.
- Fit the heater and benches. Fasten one or two simple benches to the walls.
- Seal and test. Apply a sauna‑safe wood sealant on benches and walls. Turn on the heater, let the space reach temperature, and ensure the vents are functional.
Backyard Cold Plunge
A cold plunge contains water with a temperature of 45–59°F to kick‑start your body’s recovery and alertness systems. Cold‑water immersion helps reduce inflammation and muscle soreness. It also triggers the release of endorphins, a hormone that boosts mood and focus. For optimal results, start with 1–2 minutes at 10–15°C and gradually increase to 2–3 sessions per week.
Materials:
- Galvanized stock tank or heavy plastic tub
- Gravel or pavers for the base
- Bulkhead drain valve or similar fitting with gasket
- Treated lumber for a simple frame, rigid foam board
- Exterior screws/brackets, waterproof thermometer
- Insulated lid or cover, hose water, ice blocks/frozen jugs
How to build an outdoor cold plunge
- Choose a sturdy container. Use a galvanized stock tank or heavy‑duty plastic tub.
- Prepare the base. Flatten a patch of ground and lay concrete pavers or compacted gravel.
- Position the tank. Set it on the base and ensure it sits perfectly still.
- Install a drain valve. Fit a bulkhead fitting at the base of the container for easy emptying.
- Frame and insulate. Build a treated‑lumber frame around the tank, then line it with rigid foam board.
- Secure the panels. Fasten frame pieces using exterior-grade screws or brackets.
- Fill with water. Run a hose until the tank is half full. Then, add ice gradually until the temperature reaches 45–59°F.
- Cover when not in use. Place a lid or insulated cover on top of the tank to keep out debris.
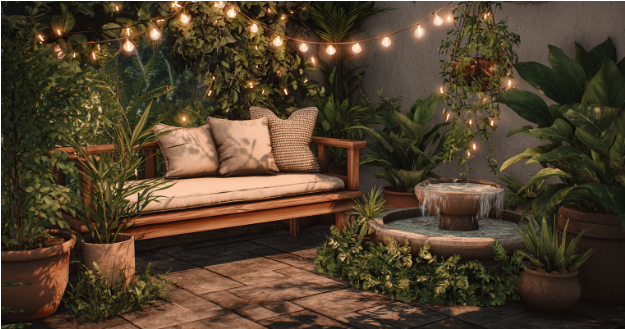
Backyard Meditation Nooks
An outdoor meditation nook provides a serene retreat where you can focus and unwind. Regular mindfulness practice in this space helps lower cortisol levels and ease body tension. It also trains your brain to minimize distractions and helps lengthen your attention span. Start with five minutes of meditation each morning and gradually extend your sessions.
Materials:
- Patio stones or an outdoor rug
- Weatherproof cushion or low bench
- Planters and potting mix
- Umbrella or small canopy
- Compact side table or shelf
- Solar lantern or string lights
- Small fountain or wind chime
- Weatherproof storage box and one personal decor piece
How to build an outdoor meditation nook
- Select a quiet spot. Pick level ground at least 10 feet away from garden paths or noisy lawn equipment.
- Prepare the base. Remove grass, level and compact the soil, then set patio stones or lay an outdoor rug.
- Add seating. Place a weatherproof meditation cushion or a teak bench on your new base.
- Outline the space. Arrange potted plants around the seat to mark the nook’s perimeter.
- Provide shade. Install a canopy or patio umbrella above the seating to shield it from the midday sun.
- Install soft lighting. Hang a waterproof solar lantern so you can meditate safely after dark.
- Introduce gentle sound. Place a self-contained fountain beside your seating for a calming background noise.
- Store extras nearby. Keep extra cushions and meditation props in a sealed container at one corner to keep the place neat.
- Personalize your spot. Display a meaningful object such as a smooth stone or a small sculpture on your side table.
Backyard Wellness Projects: Keep the Routine Going at Home
When you have a backyard wellness setup, you no longer have to wait for an available booking or drive to the nearest spa. You can finally unwind whenever you need to such as after a long day at work or right before bed.
Which zen space will you build first?
FAQs: Backyard Wellness Projects
- What are backyard wellness projects?
They’re DIY setups like saunas, cold plunges, and meditation nooks designed to support recovery and relaxation at home. - Do I need a large yard for these builds?
No. Each project can be scaled to fit small patios, side yards, or compact outdoor corners. - Can beginners handle these projects?
Yes. Each build uses basic tools and step-by-step guides meant for first-time DIYers. - How much does it cost to build one?
Costs vary: meditation nooks can be under $100, cold plunges around $200–$400, and saunas $1,000 and up, depending on materials. - Do I need a permit to build a sauna?
Possibly. Check your local building codes, especially if your sauna uses electrical wiring or a wood-burning stove. - How do I maintain a cold plunge?
Keep it covered when not in use, empty and scrub weekly, and monitor temperature and water cleanliness. - What’s the best time to use the sauna or plunge?
Either morning or post-workout, depending on your routine. Just avoid using both back-to-back without rest. - How do I create privacy for my meditation nook?
Use tall planters, fabric screens, or fencing to block views and reduce noise. - Can I build all three projects at once?
It’s possible, but starting with one helps you manage cost, effort, and consistency. - How often should I use these wellness setups?
Two to three times a week is a good starting point for sauna, plunge, or meditation routines.
Trending
Get Updates
SIGN UP FOR OUR NEWSLETTER TODAY


Related
Related